
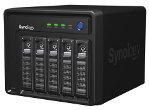
 Those, who are serious about generating hashs for pentesting WPA, for sure run a NAS server, in other words they have a storage with TBs of free space. NAS, made by Synology, is coming to be very user-friendly (especially after the possibility of upgrade to DSM 4.x). Unfortunately, there are still (obvious) components missing. Because we are talking about Linux serever, one of presumed possibilities are packets, an option to install software, or more precisely the opportunity to install a third party apps. But you cannot do such things with NAS, they are not even oficially supported.
 Wifite v2 support for cracking WPS-encrypted networks (via reaver), v2 new WEP attacks, more accurate WPA handshake capture, various bug fixes. Version 2 does not include a GUI, so everything must be done at the command-line. Designed and tested on Linux; works with Backtrack 5, BlackBuntu, BackBox, and Pentoo! Linux only; no windows or OSX support (but you’re welcome to try). Wifite was mentioned in the New York Times’ article “New Hacking Tools Pose Bigger Threats to Wi-Fi Users” Here is a link to the article.
 BeEF (Browser Exploitation Framework) is an efficient professional security tool, that provides the experienced pentester with practical client side attack vectors (including mobile clients). BeEF allows the professional penetration tester to assess the actual security posture of a target environment. It examines explotability within the context of web browsers. BeEF works on the base of hooking one or more web browsers as beachhead for the launching of directed command modules.

AFE is an open source project which aim is to demonstrate the existence of security holes in the popular mobile operating system. It also shows that Android botnet is certainly possible.
Thanks to this framework, it is easy to create automated malware and botnets for Android Platform for your analysis
(which you can even use to check the effeciency of your Antivirus), find vulnerabilities (such as Leaking Content Providers, Insecure File Storage, Directory Traversal and many others), gain access to apps, use exploits, and
execute arbitrary commands on infected devices.
 Very interesting video tutorial which step by step guides its viewers through installation and controlling of the operation system BackTrack 5 Linux for the ARM platform processors, i.e. smartphones – mobile phones with Google Android operation system for smart phones and tablets (Samsung Galaxy SIII, HTX One X, Sony Xperia X, Samsung Galax Tab 10.1, Asus Transformer, etc.) Explaining VNC remote control installed.. Android smartphones with high performance CPU..
 Abhinav Singh, Metasploit Penetration Testing Cookbook – Over seventy recipes to master the most widely used penetration testing framework. Metasploit software helps security and Information Technologies professionals to identify security issues, verify vulnerability alleviations, and manage expert-driven security evaluations. Among its capabilities belong smart exploitation, password auditing, web application scanning, and social engineering.. URL to download section at the end of the text.
 After months of development, bug fixes, upgrades, and the addition of many new tools, was announced the full release of BackTrack 5 R3 BlackHat edition available for download now. Running custom-built kernel with the best wireless support available, this is fastest and best release of BackTrack yet. In the past few weeks, after flood of submissions to BackTrack Redmine Tracker with submissions for many new tools and dozens of packages that needed to be updated and this helped to make this one of the strongest releases we’ve ever had.
Feedback from all industries and skill levels allows us to truly develop a solution that is tailored towards everyone and far exceeds anything ever developed both commercially and freely available. The project is funded by Offensive Security. Whether you’re hacking wireless, exploiting servers, performing a web application assessment, learning, or social-engineering a client, BackTrack is the one-stop-shop for all of your security needs.
Tools
arduino, bluelog, bt-audit, dirb, dnschef, dpscan, easy-creds, extundelete, findmyhash, golismero, goofile, hashcat-gui, hash-identifier, hexorbase, horst, hotpatch, joomscan, killerbee, libhijack, magictree, maltego, nipper-ng, patator, pipal, pyrit, reaver, rebind, rec-studio, redfang, se-toolkit, sqlsus, sslyze, sucrack, thc-ssl-dos, tlssled, uniscan, vega, watobo, wce, wol-e, xspy
 Book form the Café Latte attack Vivek Ramachandran, BackTrack 5 Wireless Penetration Testing – Beginer´s Guide is pretty nice completed guide of the knowns techniquesfor penetration testing wireless networks.. English writed book is full of the screenshots and concrete commands so it is realy easy learn for realy beginners in the wireless penetration testing platform.. In the text you can see list of book chapters.. The book is on the Amazonu for 20 E..
Chapter 1: Wireless Lab Setup 7
Hardware requirements 8
Software requirements 8
Installing BackTrack 8
Time for action – installing BackTrack 9
Setting up the access point 12
Time for action – configuring the access point 12
Setting up the wireless card 15
Time for action – configuring your wireless card 16
Connecting to the access point 17
Time for action – configuring your wireless card 18
Summary 22

